How To Empty Gas From A Snowblower

Winter is winding down and with it the need to worry about snowblowing. Usually this is the time period most people are trying to remember how to drain the gas tank and prepare their snowblower for storage? If this describes your situation, follow along our easy guide and you’ll be done in no time.
Why do we need to drain the tank?
Snow blowers are helpful during winter. When the snowy season is over, they need to undergo the correct maintenance process to ensure they will start right up next snow season.
You’ve probably never noticed it in your car, but gasoline evaporates at a pretty fast rate. This evaporation rate happens even faster when an ethanol mix is added to the picture. Since your gas tank isn’t air-tight there will be evaporation over the months that your blower sits idle.
If all of the fuel components were to evaporate, this wouldn’t be a big deal if you stored your thrower in a well-ventilated area. Nature would take care of the work for you. Alas, some parts of fuel blend such as additives can remain behind. Mixed in with some water vapor that seeps in, and you can end up with a corrosive mess that can wreck havoc on your engine, corroborator and hoses. Ethanol and water are a particularly nasty mix for engine parts.
This means that you have to drain your snowblower gas tank if you want to ensure an easy start next winter.
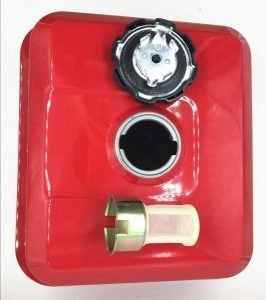
What you will need to drain gas from your snow blower
Some of the items that you will need when draining gasoline from your snow thrower include:
- Engine storage spray
 (aka fogging oil)
 - An open space away from open flames and flammable materials.
- A running engine.
- A lubricant like WD-40.
- A cup or bowl.
 (aka fogging oil)
 It is essential to point out that power equipment gasoline tanks are always drained outdoors away from any open flames. Gasoline needs to be handled with care.
Step by Step Instructions On Draining The Snowblower Gas Tank For Storage
Here’s a summary of the steps you need to follow to drain your machine’s fuel tank:
- Keep the engine running in order to burn off all the gasoline.
- (Optional) Lubricate the piston region with storage spray.
- Clean and lubricate metal, nuts and bolts.
- Find a undisturbed storage space for your thrower until next snow season.
Here are more details on each step in the process. If you prefer to see rather than read the steps, follow along in the embedded video.
Step One: Keep the engine running in order to drain out all the gasoline.
Turn on your engine and run it until it shuts off. Your aim here is to run the tank empty until the engine stops by itself. If you can easily access your fuel line, go ahead and drain what little gas that remains into the cup or bowl.
Step Two: (Optional) Lubricating the piston region with engine storage spray
These remaining steps are important to undertake when putting your machine away for the season. While these steps apply to most models of snowblowers, check your owners manual to make sure they apply to the one you own.
Avoiding rust is a big issue in prolonging the life of a snowblower. We want to reduce the formation of rust both in the engine (this step) and on the external body (step 3). While not an extremely hard step to undertake, if you have no hand-tool experience at all you might want to skip to step 3.
To apply a lubricant to the cylinder, remove the spark plug and spray some engine storage spray into the spark plug opening. Cover the spark plug opening with a cloth to absorb any excess oil. Next, rotate the engine by pulling the starter at least twice so the lubricant is distributed throughout the engine. When finished remember to reinstall the spark plug wire back to its starting position.
If you want to see this step in action, start at 1:45 in the video below and follow along:
Step Three: Snow blower cleaning and maintenance
You should then clean your snow-blowing tool thoroughly and lubricate all the essential parts. This is the time of the year where you tighten and ensure all the bolts, nuts, and screws are still where they need to be. Replace and tighten problem children appropriately. Spray lubricant on the nuts and bolts to help prevent corrosion over the next 6 months. Any repair needed on your snow blower should also be done now with respect to all broken, damaged, and worn out parts.
Where the paint has come off, you should first scrub with a sandpaper to get rid of all rust and chippy paint. Then pick the best paint yourself and repaint your snow throwing machine to give it a better look. A rust preventive product should be applied on the metallic parts especially where the auger and impeller are found.
Step Four: Final touches
Once all the above maintenance processes are done, you should find a clean area in your garage where you can store the snow blower while covered from dust. If you have a model with a handle, loosen it according to your manual.
If your snow blower needs to be stored outdoors, you should take precautions such as lifting it off the ground and using a heavy tarpaulin to block it completely from rain, sunlight, dust, and other external factors.
If you have followed these steps and still aren’t confident you did everything right, contact a local DIY expert to help determine whether your snow blower is ready for storage. Remember, these steps are for a “general” snowthrower – it is essential that you adhere to the instructions provided to you by the manufacturer of the snow blower or the items used in cleaning and maintaining it. If these instructions conflict with what your manufacturer says to do for your model, follow the advice from the guys that designed and built it.