Weed Eater Shaft – What Is It And Steps For Removing Its Base
What you will find amid the string-cutter and the engine in the weed eater you own is a bent or straight part, referred to as the shaft. The shaft comes with a lower and upper part with parts of each one having the possibility of getting hot while the weed eater is being used. What you will find at the underside of the weed eater shaft is a spinning mechanism that has string fastened that beats about and slashes the weeds, grass and additional materials. This kind of spinning machinery, referred to as the trimmer shaft, can move about very speedily, and creates heat by itself. Due to the lower part of the shaft being fastened to it, the shaft may well also get rather hot. The shaft that can be found upwards, on the other hand, is fastened to the engine of the trimmer.
This can be termed a combustion engine that has need of a mix of oil and fuel — and the presence of combustion generates heat. The higher part of the shaft is coated with plastic or rubber, but its closeness to the searing engine possibly will heat up the shaft as well. The potential for warm parts, paired with the hazard of flying wreckage, is the reason behind producer of Weed Eaters recommending that you put on lengthy pants, work gloves, a shirt, boots with long sleeves and eye guard when making use of the equipment. Do away with the underside of any weed eater shaft for connecting attachments.
Steps involved in removing the base of the shaft of a weed eater shaft for connecting attachments
A weed eater shaft houses a power cable whose function is to draw power from an engine to string cutting head or add-on like the hedge trimmer. Trimmers or Weed eaters, en example being Stihl Gearbox have been designed to acknowledge diverse landscape attachments. To be able to eliminate a specific device for putting on a different one, the underside of the weed eater shaft, or the gearbox, have got to be got rid of.
Step 1
Always keep weed eaters on top of an appropriate surface like a worktable or on top of the ground. Draw out the spark plug boot that is present on a spark plug tip for security when you work on a weed eater. This boot has the appearance of a rubber lid on the spark plug’s tip and is outfitted with a wire that emerges from it and goes into a different piece of this engine.
Step 2
Try and find the hex screws, four of them, situated on top of the gearbox that can be found at the underside of the shaft of the weed eater. Put in the angle of any hex driver inside the heads of the hex screws for turning counterclockwise for loosening and removing. Go over this process of all the three screws that remain.
Step 3
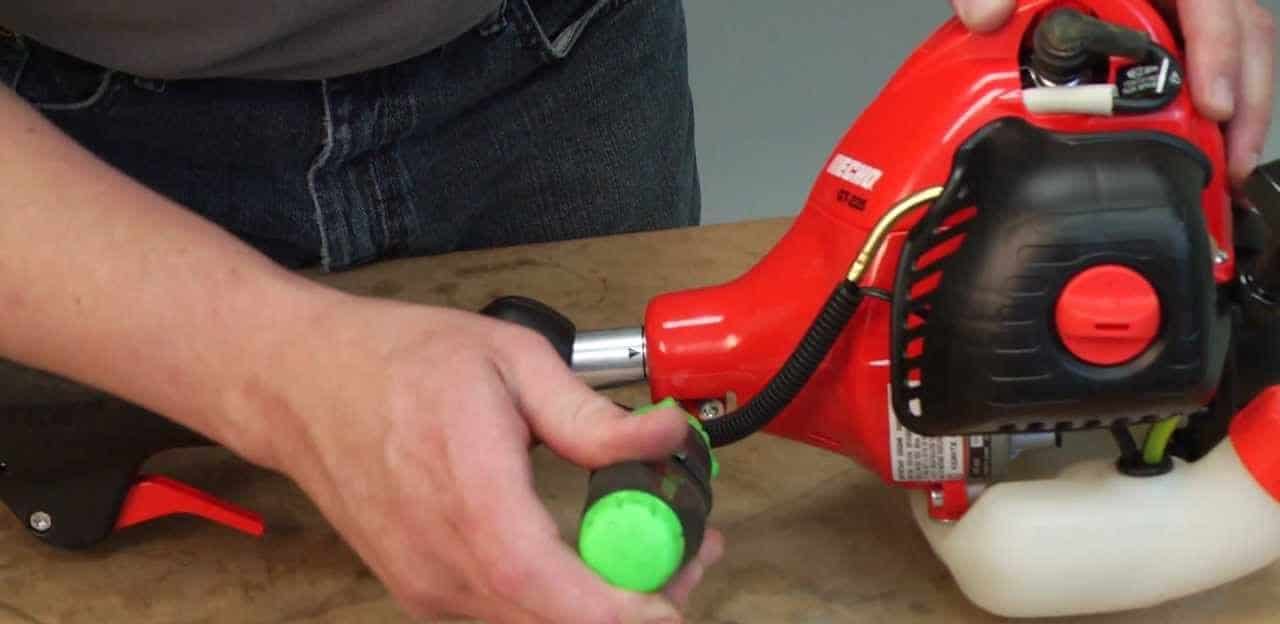
Try holding the shaft of your weed eater shaft with any of your hand while holding the gearbox in your other hand. Drag the gearbox along with the fastened accessory, like a hedge trimmer or trimmer head, off the shaft of the weed eater.
The things that are needed for this
- Hex driver
Guideline
Keep in mind that having had slid on the fresh attachment, turn the process around for putting the whole thing back in position for standard operation and this includes connecting the boot cap once more to the spark plug’s tip.
Conclusion
The supple drive shaft on the string trimmer you own is a component that will wear down with time. There are a few you tube videos showing the way of replacing a broken or worn drive shaft. Though these videos might demonstrate a specific model the steps are similar for the majority of trimmers. For example, if you own an Echo GT-225 trimmer you are going to get a replacement drive shaft, and if you own other trimmers, a good place to visit would be Ereplacement Parts.
The other articles may you concern, as this is by: